Mastering SAP ABAP Screen Painter: Exploring Layout Elements for Intuitive UI Design
Layout Elements :-
In SAP ABAP's Screen Painter, layout elements are the building blocks used to design the visual interface of screens. These elements include input fields, output fields, push buttons, check boxes, radio buttons, etc. Here's a breakdown of the common layout elements and their functionalities:
- Input Field (I):
- Input fields allow users to enter data.
- You can define properties such as field name, length, data type, and default value.
- Users can input alphanumeric, numeric, or date/time values depending on the field's data type.
- Output Field (O):
- Output fields display data fetched from the backend or calculated dynamically.
- These fields are typically used to present information to users and are read-only.
- Properties like field name, length, data type, and formatting options can be set.
- Push Button (P):
- Push buttons trigger actions or events when clicked by the user.
- You can define the text displayed on the button and associate it with specific functionality.
- Actions can include navigating to another screen, executing a function module, or performing data validation.
- Check Box (C):
- Check boxes allow users to select or deselect options.
- They are commonly used for binary choices or toggling certain settings.
- You can define the label text associated with the check box and its initial state (checked or unchecked).
- Radio Button Group (R):
- Radio button groups present users with multiple mutually exclusive options.
- Users can select only one option from the group.
- You define multiple radio buttons within a group and specify the group name to link them together.
- Each radio button has a label and a value associated with it.
- Text Field (T):
- Text fields are used for displaying static text or informational messages.
- They provide labels, instructions, or descriptions to guide users.
- Text fields are read-only and cannot be edited by users.
- Subscreen (S):
- Subscreens allow you to embed another screen within the current screen.
- They are useful for modularizing screen design and reusing common components.
- You specify the name of the subscreen and its position within the layout.
- Container (Cn):
- Containers are used to group related elements together.
- They provide a logical structure for organizing UI elements on the screen.
- Containers can contain other layout elements, such as input fields, output fields, buttons, etc.
These layout elements provide the flexibility to create intuitive and user-friendly interfaces for SAP applications. By combining them effectively within the Screen Painter, developers can design screens that meet the specific needs of end-users and business processes.
We started with the requirement in our previous part regarding Creation of two screens ‘0100’ and ‘0200’ and then navigating between them.
How to design a layout in Module Pool Programming ?
-
We design a layout in Module Pool Programming using Screen Painter.
-
To open, the Screen Painter → Click on the Screen → and Click on Layout button.
-
Whenever you will click on the layout, you will see a popup will open which is called the Screen Painter, where you can design the Layout elements.
Requirement :-
-
Suppose, this is our Order Header Table.
-
We will design a layout of Order number, where we will take input as Order Number and we will show the details of Order Number as the Output.
Solution :-
-
Step 1 :- Click on Text field to display the Order Number and drop it.
- Provide the text as Order Number.
-
Step 2 :- Click on the Input/Output field and drop it on the screen.
-
Step 3 :- In the Name Column Provide the table name-fieldname.
-
Step 4 :- Once you will press enter, a popup on the screen will appear asking for the Dictionary definition.
-
Step 5 :- Click on Yes.
-
Step 6 :- Click on Pushbutton, to create a custom button on the layout.
-
Step 7 :- Give a name as Submit and double click on it.
-
Step 8 :- Provide a function Code for the button.
-
Now, One half of our requirement is done,
-
Step 9 :- Click on Dictionary/Program fields Window F6 → pass your table name and click on get from dictionary.
-
Step 10 :- Select the required field and press enter and drop on the layout.
-
Step 11 :- Now, our layout looks like this.
-
Activate the program and execute it to check whether it appears or not.
-
Our screen will appear like this one.
-
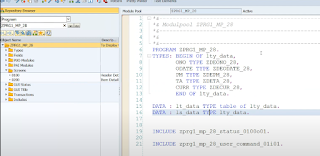
Step 12 :- Declare a type structure on the program.
-
Step 13 :- go to PAI of screen 100 and write the below logic for it.
-
Activate the Program.


.png)
.png)

Comments
Post a Comment