Designing Layout in Adobe Forms Part 2
In the previous part, we say that we call design our layout by clicking on the layout tab.
- We can see one master page is already given by ADLC ( Adobe Livecycle designer ) creates automatically.
Master Page :-
-
Every form design contains at least one master page that adobe livecycle designer creates automatically.
-
Master pages are responsible for formatting body pages.
-
The purpose of master page is to provide the design consistency,
For eg.
Suppose, you want to design a logo on all the body pages, so we will design that logo on the master page and it will be automatically br reflected on all the body pages.
Body Page :-
- Body pages represent the pages of a form.
- Each body page derives its page size and orientation from a master page, and by default, each body page is associated with the default master page that adobe livecycle designer creates.
- Each body page is created with a default sub form that covers the whole page.
What we have to design ?
- So, for Each section we will create one sub form.
1. Subform for Heading Employee Details .
2. Subform for Employee Id and its value.
3. Subform for title Employee
4. Subform for Employee Details.
5. Subform for Title Project Details
6. Subform for Project Details.
- Since, we have dynamic data for project details we select FLOWED in its context.
- So all these sub form we will design on the body page.
1. Subform for Title Employee Details :-
- Step 1 :- Right click on the page → Insert Subform.
- Step 2 :- Select the sub form → Click on Insert → Standard → text.
2. Subform for Employee Id and its Value :-
- Step 1 :- Right click on the page → Insert Subform.
Note :- Whenever we want to print a text label and its value, then we create a text field in the adobe form.
-
Step 2 :- Select the subform → click on insert → Standard → Text Field.
-
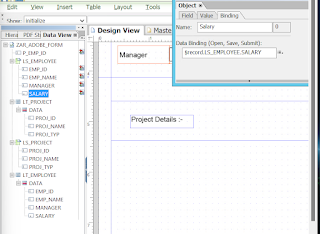
Step 3 :- Now bind the employee id value with the text field.
-
Step 4 :- Click on save.
3. Subform for Heading Employee :-
-
Step 1 :- Right click on page → insert subform.
-
Step 2 :- Select the subform and click on insert → text.
4. Subform for Employee Data :-
-
Step 1 :- Right click on page → click on insert subform.
-
Step 2 :- Since, we want to display 4 fields in the employee therefore, we will create 4 text fields in the employee and then we will bind the work area fields that we have pass through the interface.
5. Subform for Project Heading :-
6. Project Details Data :-
-
This is the dynamic section of our adobe form, data should flow to the next page, if number of items gets increased.
-
Step 1 :- Create a sub form.
-
Step 2 :- Open the Data View.
-
Step 3 :- Drag and drop the internal table of project details into the sub form.
- We can see the columns, will automatically come, It is a flowed data, therefore we will change the property of this form to FLOWED.
- Click on save.
- Activate the Adobe Form.
.png)
.png)
.png)
.png)
.png)
.png)
.png)
.png)
.png)
.png)
.png)
.png)
.png)
.png)


Comments
Post a Comment