Posts

Showing posts with the label ABAPDictionary

Mastering SAP Transactions: Creating Custom Transaction Codes and Case-Sensitive Table Management
Image
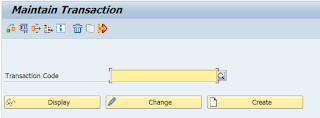
  Welcome back everyone, So basically we were discussing about lock objects in our previous blog. You have noticed, I have been using the term transaction codes very often, In this blog we will learn how to create transaction codes for tables. How to create a transaction code ? We use transaction code SE93 for creating our own transaction codes manually. Creating transaction code for our Order Header Table:- Step 1 :- Go to transaction code SE93. You will see a screen, same as below Step 2 :- Give a name and click on create button. Step 3 :- Provide Short description and for creating transaction code for table ( In Start object select the radio button → Transaction with parameters ( parameter transaction ) ). Note :- We will discuss and use the remaining radio button, in the nearby future in other upcoming topics. Step 4 :- Press enter. Step 5 :- Since, we want to open SM30, whenever we open our TCODE , therefore provide SM30 in transaction field and cl

Deep Dive into SAP Table Buffering: Single vs. Full vs. Generic Area Buffering, Practical Implementation, and Lock Objects

Image
 Welcome back everyone, so basically we were discussing about Single Record buffering and we had discussed that in single record buffering at a time, only single record will pass. Full Record Buffering :- In case of full buffering, full table records load into the buffer at a time. When to use :- Tables that are best suited to full buffering are frequently accessed and rarely changed. A table which stores transaction data should not be opted for full buffering. Advantage :- There is a significantly reduction in number of database access. Disadvantage :- This type of buffering requires more memory on application layer. Practical Implementation of Full Record Buffering :- Step 1 :- Open our order header table in change mode. Step 2 :- Go to technical settings, and select fully buffered → activate the table. Step 3 :- At this moment, if you go to transaction code al12 and open the buffer. Step 4 :- you will see nothing will be in the buffer. Step 5 :- Open the

Exploring SAP: Leveraging Help Views in Search Helps and Unraveling the Mysteries of Table Buffering

Image
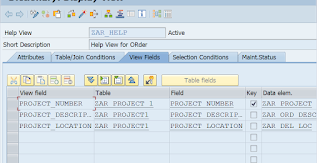
 Welcome back everyone, So basically we have discussed Search helps in the last blog, So let’s continue How to use Help view in Search help? → If you remember, when we were discussing about help view, I had told that we will use it in Search help.      So, this is our help view which we had created in our previous blogs. Step 1 :- Go to SE11, select the search help radio button and give a name and press enter. Step 2 :- select elementary search help and press enter. Step 3 :- provide a short description. Step 4 :- In selection method, we will write the name of our help view → and we will choose our search help parameters. Step 5 :- Save and activate our search help. Step 6 :- Now, we can execute our search help with F8 and you will see it is displaying the contents, In help view we were unable to display the contents but we can display them by using them in search helps. So, this is enough for search helps and now we will start Table Buffering. Table

Mastering Search Helps in SAP ABAP: Creation, Assignment, and Collective Search Helps

Image
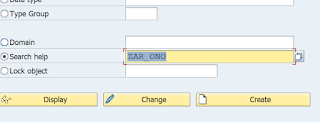
 Welcome back everyone, we already have discussed what are search help in our previous blog. Today, We will start with creation of Search help. 1. Requirement :- Create a search help for Order number for our Order header table. Kindly refer to previous blogs, how to create the order header table. Step 1 :- Go to SE11 and select Search help radio button. Step 2 :- Give a name and click on create. Step 3 :- A popup screen will appear with two radio buttons → firstly select elementary search help and press enter. Step 4 :- Provide the short description. Step 5 :- In selection method we have to provide the name of the table or name of the view from where we are fetching the data. Step 6 :- In dialog type select the value according to your requirement. Step 7 :- In search help parameter, press F4 and select the values you want in the search help. Step 8 :- For now mark Import and Export and List Position and Screen Position as shown below. Step 9 :- Save